Good morning Wargamers, Bruce here with a work in progress painting guide on my old and dusty Fortress of Redemption.
I bought this thing about 12 months ago on a whim, and (like so many other GW kits) has sat in a box in my gamesroom ever since. Sam came over the other night and we salvaged the kit, sprayed it up and made a start on getting it up to scratch.
I only occured to us to make a WIP post up here on the Six Up Save blog once we were already a few steps in, so the pictures only kick in once the thing had been basecoated. Fortunatly its a pretty self explanitory step, so theres nothing important missing.
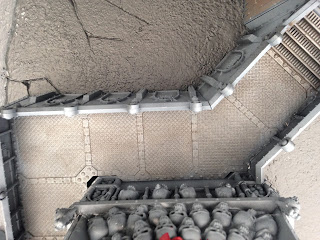
First off we coated the entire thing in GW's "Chaos Black" spray and once it was dry we gave it a second coat in "Mechanicum Grey". The grey coat was done at a sharp angle so as not to fill in the details, which we wanted to leave all shady and atmospheric. Once this was dry we had the start of a really great looking peice of scenery:
Then I blacked out the tops of the wings:
And then filled in the scroll and the creepy figure's boney fingers in Karak Stone.
Whilst I was busy slapping paint on all the easy bits, Sam has kindly voluteered to tackle some of the more complicated bits.
 |
| The official GW image for the Fortress. |
I bought this thing about 12 months ago on a whim, and (like so many other GW kits) has sat in a box in my gamesroom ever since. Sam came over the other night and we salvaged the kit, sprayed it up and made a start on getting it up to scratch.
First off we coated the entire thing in GW's "Chaos Black" spray and once it was dry we gave it a second coat in "Mechanicum Grey". The grey coat was done at a sharp angle so as not to fill in the details, which we wanted to leave all shady and atmospheric. Once this was dry we had the start of a really great looking peice of scenery:
Next up we split into two teams. This is a big job and we wernt going to get very far unless we worked on a few key areas simultaneously. I decided to go for the central tower and make a start on the larger surface areas. First off I set to work on the cloak, and seeings as it will be the base of opperations for my Blood angel Successors "The Redeemers" I went for the tried and tested "Khorne Red".
Then I blacked out the tops of the wings:
And then filled in the scroll and the creepy figure's boney fingers in Karak Stone.
Once the Karak stone had dried I washed it all with "Agrax Earthshade". I
also gave all the red robes a wash down with "Carrion Crimson". Finally I painted in the figure's Halo with "Hashcut Copper" and Highlighted the edges with "Gahenna Gold".
Whilst I was busy slapping paint on all the easy bits, Sam has kindly voluteered to tackle some of the more complicated bits.
Colours used here were fairly simple. Painted the skulls un ushabti bone, washed with angrax earthshade and then hihlighted with ushabti. When I continue with this piece I will go over with screaming skull.
Used runelord brass and copper on the gold part before washing with angrax.
The rivets were dotted with runelord near the centre of the model around the aquilla but the others were lixked out using boltgun metal.
The surrounding connectors were painted in boltgun before washed with nuln oil.
I wanted the cables behing the skulls to stand out and give another aspect to the turret that was not gold. Used khorne red and moot green to pick out the wires.
The barrel of the gun was drybrushed boltgun metal after having the laser array painted khorne red. The end of the gun has been left black for some possible airbrush heat effects to be added.
Started work in the bunker as well painting the golden wings and washing the walkways with angrax.
Check back later when we will post the next steps detailing how we continued with this piece. It will most likely take another few sessions. We hope you enjoyed reading this post. Any comments or questions please feel free to post.
Bruce


Comments
Post a Comment